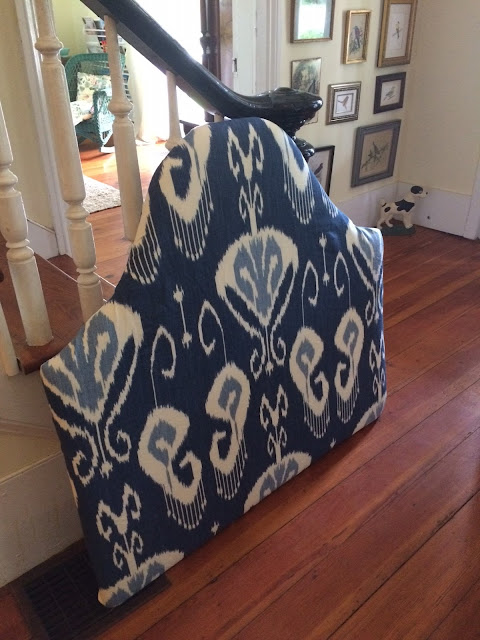
Dorm Headboard Tutorial
It is THAT time of year, again!
Time to gather those little chickadees and shoo them out of the nest.
With the internet and Pinterest and Google, dorm room decorating has never looked so good or involved so much time and money. (Moms of boys - you need to keep reading so that you can be thankful you have boys!)
Life was a bit simpler in 1987. It is amazing how things have changed. Everything I needed for my first semester of college was packed into my mom's Volvo. "Everything" included both winter AND summer clothes, along with a mini-fridge, a box fan, my mom, my Aunt, and me. (My Aunt was there to accompany my mom to the mall. My college was in "the big city.") We simply had to "make do" with our dorm room and its condition when we arrived. And had to "make do" with our new roommates, too. (No pre-arranged internet stalking roommate arrangements, way back then). I'm not even sure my mom walked up the three flights of stairs in my unairconditioned dorm to glance at my room or to verify that the shared hall bathroom was suitable for her princess. Where I went to college (and where my daughters go), the dorm and campus were formerly male-only, for decades, and then someone realized women could be adept at math and science, too, opening the campus to female students. The shared hall bathroom had a large shower room with ten shower heads and five or six plastic curtains dangling from the ceiling in an attempt to pretend to give us privacy. (Not the way a princess likes to take showers.) I guess that is the reason I can still remember that shower room configuration so clearly.
Way back in 1987, there were no dorm room furniture dimensions on the internet, no Pinterest boards to share with our new roomie and her mom. No cell phone to text photos from TJMaxx or Ikea and beg my mom via texts for new decor. None of that.
Those were the dark ages.
Pre-Pinterest.
Those were the dark ages.
Pre-Pinterest.
Anyway, here are two new dorm headboards I made for a friend of ours as her high school graduation gift.
It was a graduation gift that she just received from us this week -it's August, already - oh, well!
I have a dorm room headboard making tutorial that I shared before here and another one here. Or, you can simply keep reading and I will tell you how to make one.
The board will just sit on the rails, between the mattress and the bed frame, like this....
They are relatively easy to make - just have the nice guy at Lowe's cut the $18 sheet of plywood to the dimension you need. One sheet makes two headboards. I find that most dorm beds need a piece about 36" to 40" wide by 40" tall. My daughter then talks my husband into cutting the headboard in a cute shape.
Here is my daughter's sketch from last year and her headboards from last year....
I used wrapping paper to make the template to cut the board. Just be sure to fold the paper down the middle, once you get the design, so that both sides are identical (mirror image).
A basic rectangle works, too. Here is a before and after of my eldest daughter's room. This is a room she was in for two years....
The gray headboard was the first year. Then, we just covered over the rectangular gray headboards the next year after she and her roommate painted over the pink walls they were tired of seeing every morning. (The gray with salmon-orange was prettier, imo)
I shared in a previous post how to measure for the headboard if you know the dimensions of your future dorm bed. The headboard needs to be WIDER than the rails so that it doesn't slip between the rails..
How to Make a Dorm Room Headboard using Plywood:
1. Go to Home Depot/Lowe's and pick a fairly sturdy piece of plywood that has not been chemically treated (indoor use). (Will actually be large enough for 2 headboards.)
2. Have Lowe's cut the $18 plywood board to dimensions you need (measure rails for width and a height of 36" to 40" works well).
2a. (Optional) - have someone use a jig saw to cut top of headboard in a design.
3. Cover the front of board and edges with mattress foam ($16 or so from Walmart) or quilt batting from fabric store. (One queen sized foam pad was enough to cover 2 twin headboards - just had to fudge a little on one corner)
4. Use staple gun to attach foam to the back of the plywood headboard.
5. Cover with fabric of your choice and staple to back the same way you stapled the foam.
Voila! You are done!


Comments
Happy day friend!
karianne